It all starts with pines
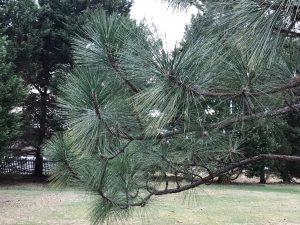
First I have to get pine needles. I like to use Southern Longleaf pine needles because they are luxuriantly long and thick, but still flexible. I was lucky enough to meet someone from Newport News who has mature Longleaf pine trees. He shares his fall bounty with me, and I am ridiculously grateful! I have also been able to get some pine needles from the local Forestry Service office, and I have purchased some in South Carolina. I would love to have my own tree, but I appreciate the generous donations of Longleaf pine needles that I have received from those who have more than they know what to do with.
Finding the pine needles is the first step. A box of raked up needles is a long, long, way from a basket, though. They must be untangled and sorted, disposing of any that are broken, moldy, or twisted. They must be completely dry to use or store. Green pine needles need to be dried for weeks. Once I have separated out the usable needles, I wash them in hot, soapy water and lay them out to dry. I can use them as they are or dye them or soak them in glycerin.

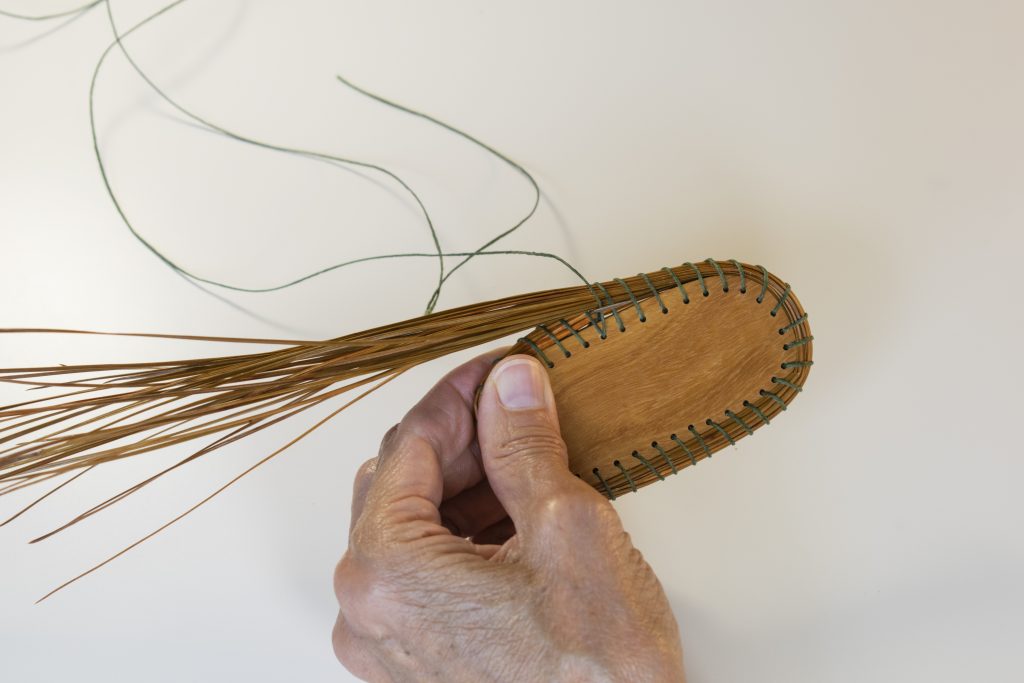
Pine needles don’t pick up dye very well, so the dying process is lengthy, and the color of the result is not always predictable! Treating the needles in glycerin makes them more flexible and also a darker brown. Most often the woody “cap” of the pine needles is removed before use by snapping it or scraping it off. Sometimes the caps are left on as an embellishment.
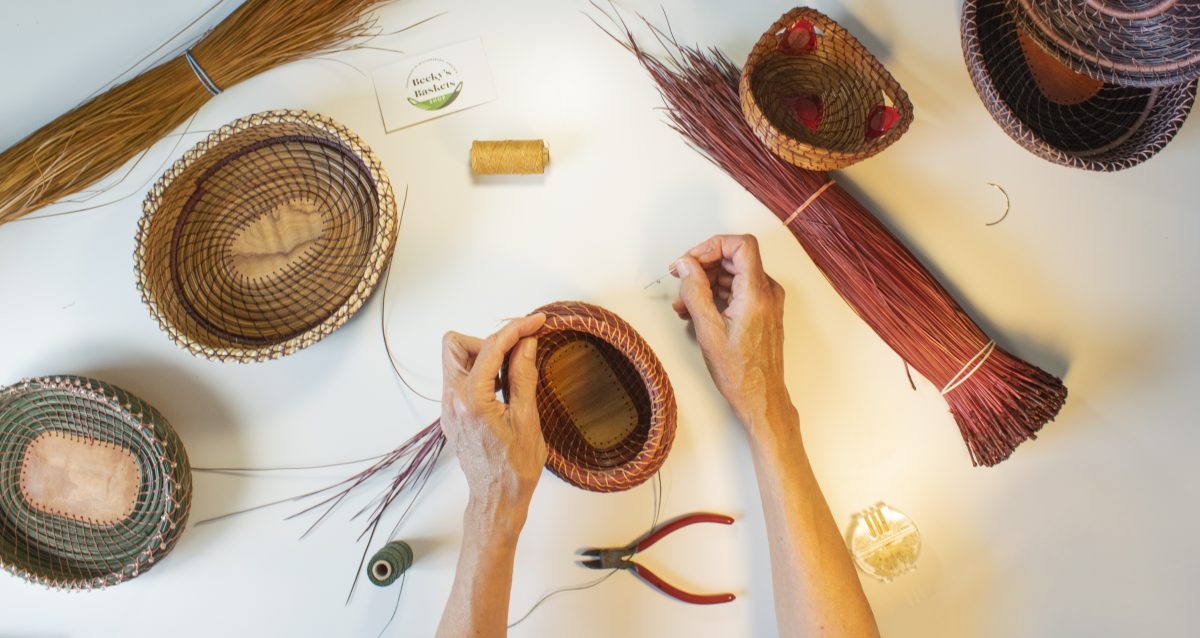
The start of a basket is always exciting because I never know how it will turn out. I generally start with a plan, but I frequently have to alter that plan as I go along. I usually begin by looking through my centers, threads, and beads to choose a new combination. When I am out shopping, or foraging in the woods, I am always on the lookout for new items to use as centers or embellishments.
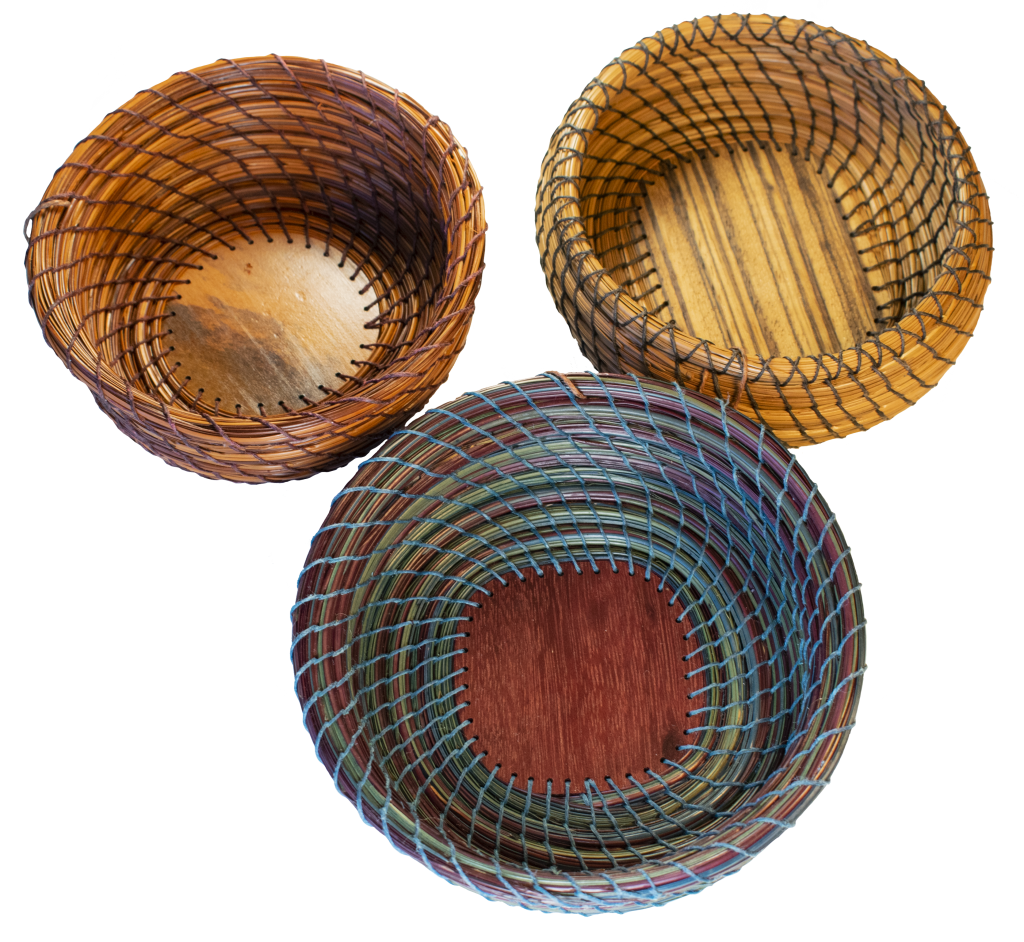
During the pandemic I learned how to create my own wood centers. I get scrap pieces from a wood dealer, and I cut, sand, drill, and finish them in a variety of shapes and sizes. I enjoy having a variety of exotic wood centers ready for any creation I dream up. I may also choose a center such as a walnut slice or an agate set in resin, or I just start by wrapping the needles. The start of a basket requires concentration and patience. It is slow and can be frustrating when needles break or refuse to bend to my will! Once the center is established though, the slow but relaxing coiling process takes over. A small basket will take about 6-8 hours over the course of a week, depending on the stitching techniques used and the embellishments. Larger baskets and free-form designs take several weeks or a month to complete. I like to have a basket in process all the time so that whenever I want to sit still for a while, I have something to work on. My first baskets were frequently completed while I waited for my son during his sports practices. Since then I have completed baskets while riding in the car, traveling by train or plane, and even on cruise ships!
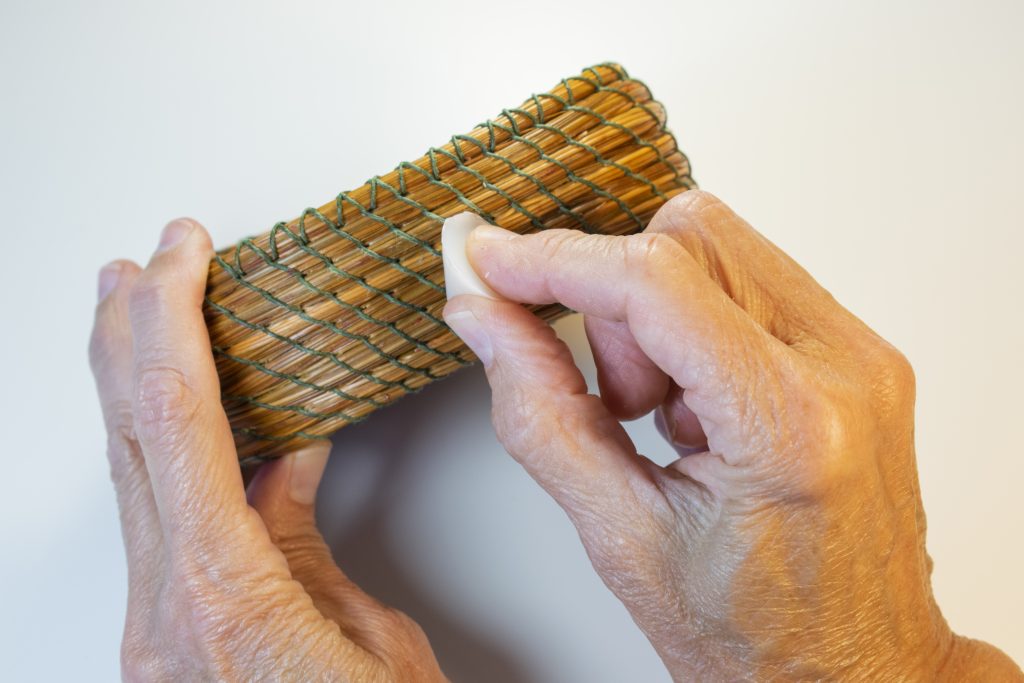
Once the basket is complete, I may decide to coat it with beeswax. Beeswax makes the basket firm and helps to protect delicate needle caps. On the other hand, it darkens the color and limits flexibility, so I use it for some baskets and not others. The waxing process is a bit scary since the beautiful basket is first made ugly by painting it in wax. Then it is “cooked” in a warm oven to melt the wax into the needles.
It is always a relief to take it out of the oven and see the final result!